
For more fermented food recipes, join/renew for one or three years with code KITCHEN to claim your free copy of The Fermentation Kitchen by Gabe Toth.
The following article is featured in the March/April 2021 Zymurgy magazine.
By Amahl Turczyn
Miso is a fermented paste traditionally made with soybeans. As with sake, miso ferments with the help of koji, that magic culinary mold Aspergillus oryzae, grown on rice or barley. The cooked soybeans are mixed with koji and a percentage of salt to control fermentation and deter unwanted microbes, and then blended into a paste and left to ferment at room temperature.
Miso may be unfamiliar to many western people, but it is an absolute cornerstone of Asian cuisine, particularly Japanese, and it has all kinds of applications in the kitchen. Trained tasters of beer and other foods are familiar with the primary taste umami that comes from glutamates in products like beef, Marmite, and mushrooms. Well, miso is the holy grail of umami, and once you’ve fermented a batch, you’ll soon find applications for it far beyond Asian cuisine.
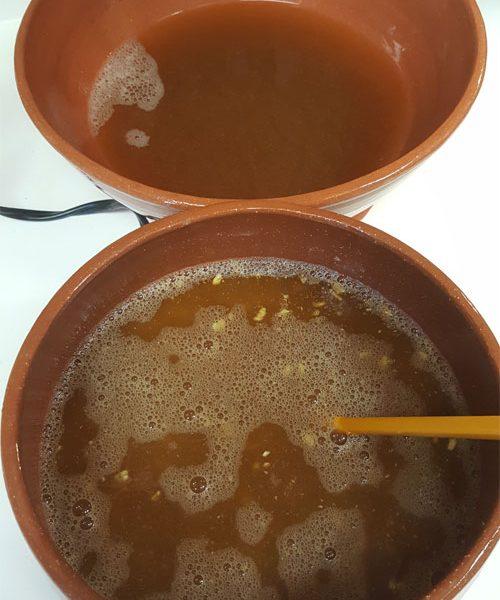
Miso is perfect for enhancing soups, stews, and sauces of all kinds, but it isn’t used by western chefs nearly as much as it deserves to be. You might be more familiar with tamari, which is a variant of shoyu (what we know as soy sauce)—tamari is a byproduct of miso fermentation, so you basically get two products from one ferment. It’s particularly satisfying to harvest tamari off the surface of your fermenting miso, as it is delicious and gives you a good sense of how your miso is evolving. The presence of this richly flavored, salty brown liquid is also an indicator that your miso fermentation is progressing as it should.
Miso fermentation is not difficult, but depending upon what type of miso you want to make, it can be time consuming. For example, sweet white miso takes about three or four weeks to ferment, but the savory, mellow, slightly funky red miso that packs the biggest umami punch can take six months or more, depending on ambient temperatures and desired degree of fermentation. However, your patience will be rewarded with something truly unique and culinarily versatile.
Each batch comes out a bit different every time, as it is a product of your particular environment and locale, with flavors and aromas dictated by the fermenting microbes involved. It’s also very good for you: many store-bought miso products are pasteurized, but there is no reason to kill off all those active enzymes and bacteria that are so good for your gut health, immunity, and digestion. Finished, home-fermented miso can stay in your fridge for years, no worse for the wear. As with many other fermented foods, you can take a bit from a previous batch to use for the next; this “seed miso” ensures some level of continuity. Plus, the more often you make miso, the more your technique will improve.
Producing your own koji rice or koji barley is an art in itself, but it requires fairly advanced techniques and specialized equipment. Fortunately, there are several readily available sources for this vital ingredient, and it’s not particularly expensive. As with malted barley for brewing beer, you can theoretically make it yourself, but purchasing it ready made by the experts means your ferment has a much better chance of success. Rice koji is common for sweet white miso (short term); rice or barley koji are used for savory red miso (long term). Your koji producer should specify which is which, so read the description carefully. I’ve had success with koji produced by a Vermont company called Rhapsody Natural Foods, but there are many others out there.
Just be sure you are getting koji grains—another product called koji kin is basically just the mold spores without the grain. It’s often marketed as a dry-aged beef product, as people can sprinkle a bit on a steak and, in about two days in the refrigerator, the Aspergillus will partially “digest” the meat, producing delicious umami glutamates that mimic a two-week dry age. However, koji kin is not suitable for producing miso by itself; you would first need to go through the steaming, cooling, and inoculation of the grain with the mold spores and hold the mixture at a specific temperature and humidity to get the mold to grow.
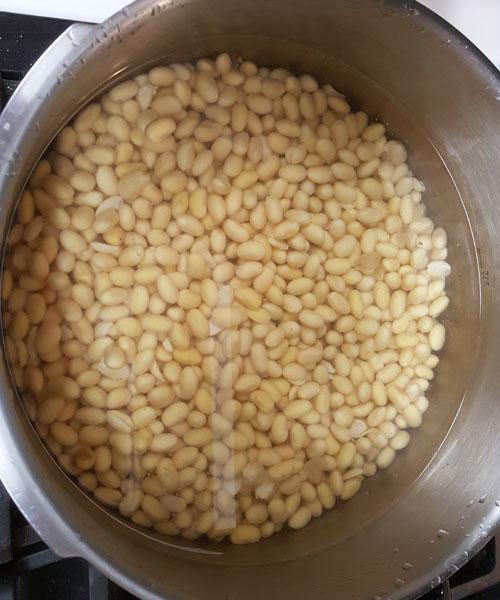
Soybeans for miso are pretty easy to find. Organically sourced beans ensure a pesticide-free miso. For either short- or long-term miso, you’ll need to soak the beans overnight and then boil them until they are very soft—three to five hours might seem like overkill to achieve this, but it is a common boil time when making miso. A pressure cooker can reduce this time somewhat, but you want the beans so soft that they squash to a paste easily between your fingers.
Whatever you do, don’t add the salt before you boil; if you do, the beans will remain firm and never reach the soft consistency needed. You just want pure water and beans for both the soak and the boil.
To get the intense brown-red color needed for red miso, you’ll need to cook the beans even longer. They start out white after soaking, but eventually the cooking liquid turns a deep, dark red. You’ll need to keep topping the beans off with water as they cook to keep them from burning while they develop their color.
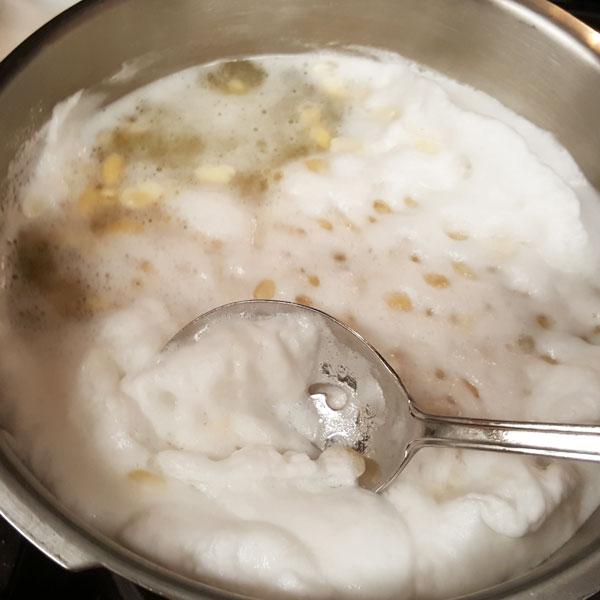
When you first start to boil the soybeans, you’ll notice a lot of pillowy white foam rise to the surface of the water. If left in the beans, this foam may cause digestion problems—it’s a common technique with many legumes to skim off and discard this foam during the first 20 minutes or so of cooking, so be ready with a slotted spoon or the like. Then, when no more foam arises, you can cover the beans and let them cook down for several hours, only checking them occasionally to monitor the water level.
You’ll also notice that the beans shed a translucent skin as they cook and soften, as do other legumes such as garbanzo beans. It is not necessary to remove these skins, but I often do anyway.
After the boil, let the beans cool down in their liquid to 100°F (38°F). Pour off the liquid and reserve it for later. Add the koji rice or koji barley to a separate bowl and add just enough of the bean cooking liquid to moisten the grains, about 1.5 cups of liquid per pound of koji grain (780 mL per kg). It usually takes about 15 minutes to fully hydrate the koji grains. Then, stir your measured salt into the wet koji grains and add that mixture to your cooked, cooled beans. If you have “seed miso” from a previous batch, now is the time to add it. A quarter to a third of a cup (60–80 mL) is plenty.
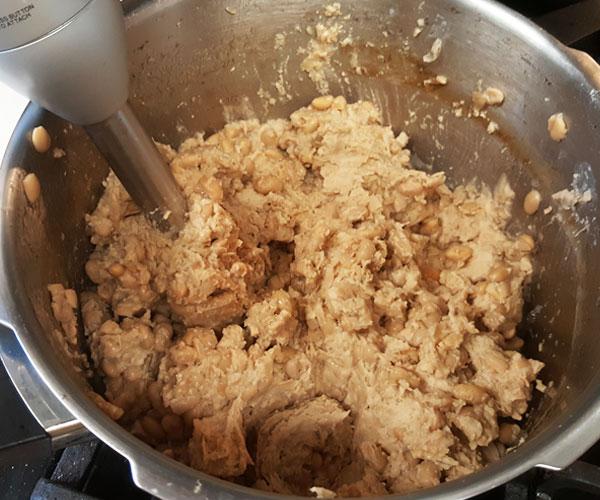
Next you need to mash the miso. Some people use a meat grinder, but a potato masher works, too. The consistency is up to you; you want all the ingredients well blended, but you can go smooth or chunky. I’ve actually used a hand blender at this point, which worked well until it overheated and seized, so just make sure yours is up to the task. The miso should end up as a thick paste, about the consistency of peanut butter. You’ll need to add another cup or two (240–480 mL) of the reserved liquid for the larger volume of red miso, but try to keep the paste stiff enough to form into a ball.
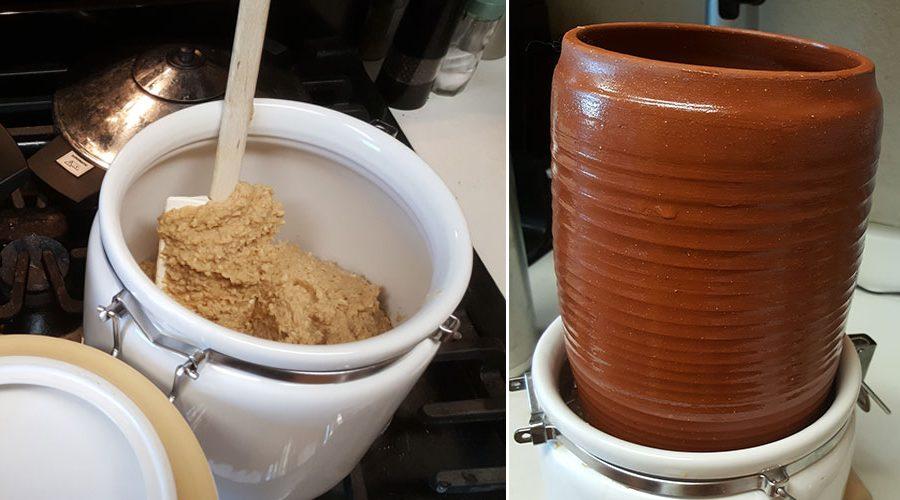
Next, prepare your fermentation vessel. You can use a crock with a lid or a wide-mouthed earthenware container. You’ll be placing a weight on top of the fermenting paste to keep gas bubbles from forming, so make sure that’s easy to do with your chosen fermenter. Sanitize the inside of the container by filling it with boiling water (or use a good homebrew sanitizer), and then drain it and sprinkle or rub the inside surface with sea salt and leave it to cool to 100°F (38°F).
Now you want to pack the blended or mashed paste into the prepared vessel. This was traditionally done by using your hands to form balls of paste and throwing them forcefully into the fermenter, but as fun as this sounds, the reason behind it is to make sure there are no air pockets in the paste. Press everything in thoroughly, keeping the inner sides of the vessel as clean as possible. Mold other than Aspergillus is now the enemy, especially for a long-term ferment, so you need to do everything you can to keep your miso mold-free from here on out.
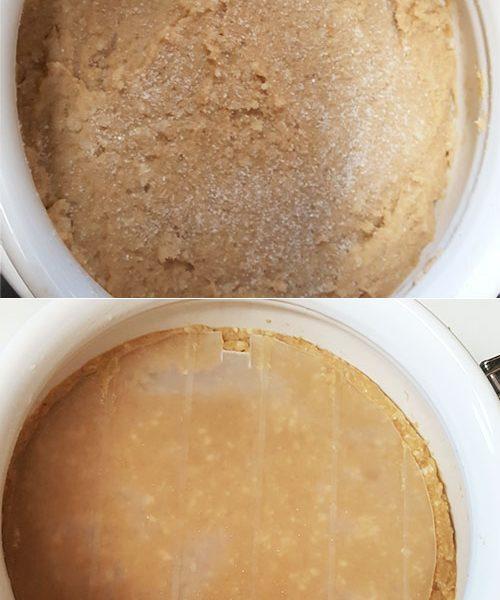
Smooth the surface of the miso, and cut a piece of clean canvas, cheesecloth, or cotton hand towel to fit over the surface of the paste. Sprinkle the paste evenly with a little more sea salt, particularly around the edges, and then apply the cloth. As an extra precaution at this point, I use a small spray bottle filled with pure grain alcohol and lightly mist down the inside of the vessel above the paste.
Cover the surface of the miso with a plate or hard plastic lid and add a weight—I use another crockery jar for this. You want the weight approximately equal to the weight of the miso, so if you don’t have something heavy enough, you can fill the inner vessel with water. A large rock on the plate also works.
Cover the whole thing with a clean cloth or plastic wrap. Gases need to escape, but you want to prevent free access by airborne microbes that might potentially spoil your miso. Be sure to label the miso with the type and date of preparation, and leave it on a countertop at ambient temperatures for three or four weeks for white, or six months for red.
If you are making sweet miso, it should be close to done after a month’s time. Check for wild yeast or mold growth—if some is present, don’t panic. A few flecks of brown, yellow, or green mold, or whitish yeast, are fine: just scrape them off, make sure the miso smells good, and keep the weight on until you’ve reached the desired level of fermentation. If, however, you notice any red, black, or bright neon-colored molds, you should dump the batch and start over (this happens rarely, but these are pathogenic and potentially poisonous).
You can taste a little to determine if it’s how you like it. Then you can begin using it as needed. Refrigeration is optional; just know the miso will continue to mature and evolve at warm temperatures, whereas cold will slow the ferment nearly to a halt. Scooping the paste into a Mason-type jar and loosely covering with a lid is the best way to store miso in the fridge. It will also drastically reduce any further chance of contamination by pathogenic microbes.
With red miso, the one-month mark is still early in the process. This is when you should begin seeing tamari seeping from the surface. You can harvest the liquid if you like and store it in a small jar or squeeze bottle for use in the kitchen. A syringe or turkey baster works great for this: just tilt the fermenter and remove what you need. Again, check for mold, use your nose, taste a bit if you’d like, and if everything looks good, you can let the fermentation go another month. Mark the six-month anniversary on your calendar; you should have a delicious, mellow, umami-rich red miso by that time.
Sweet White Miso Recipe
Yield: 3 lb. (1.36 kg), approximately
Ingredients
- 8 oz. (227 g) organic soybeans
- 1 lb. (454 g) short-term koji rice
- Carbon-filtered water, as needed to boil soybeans
- 1.5 cups (355 mL) cooking liquid from boiling the beans
- 3 Tbsp. (51 g) sea salt
- 3 oz. (85 g) seed miso from a previous batch (optional)
Instructions
Measure and wash the soybeans well in cold water, then cover them with a couple of inches of cold, filtered water and allow them to soak overnight. Drain, cover with another two or three inches of filtered water, and bring to a boil. Skim and remove any white foam that rises to the surface over the first 20 minutes of the boil. Then cover and boil until very soft, 3 to 5 hours. With a pressure cooker, the proper consistency can usually be reached within 2 hours.
When done, allow the beans to cool to 100°F (38°F). Drain off the cooking water and reserve in a large bowl. Measure koji rice into another container and hydrate with just enough of the cooled cooking water to moisten the grains. When soft, mix in the salt and seed miso, if using, then add the cooked beans and mash thoroughly.
Sanitize and salt your fermenter, then pack the bean paste into it, pressing out any air bubbles as you go. Smooth the surface, dust with a bit more salt, then cover with a fitted piece of clean cloth. Add a plate, dish, or lid to cover, then place a weight on top that’s approximately the same weight as the miso.
Allow to ferment at room temperature for at least 3 to 4 weeks. When fermented, pack into a Mason-type jar with a lid and keep in the refrigerator for use.
Savory Red Miso
Yield:
6 lb. (2.72 kg), approximately
Ingredients
- 1.6 lb. (726 g) organic soybeans
- 1 lb. (454 g) long-term koji rice
- Carbon-filtered water, as needed to boil soybeans
- 3.5 cups (828 mL) cooking liquid from boiling the beans
- 8 oz. (227 g) sea salt
- 6 oz. (170 g) seed miso from a previous batch (optional)
Instructions
Measure and wash the soybeans well in cold water, then cover them with a couple of inches of cold, filtered water and allow them to soak overnight. Drain, cover with another two or three inches of filtered water and bring to a boil. Skim and remove any white foam that rises to the surface over the first 20 minutes of the boil. Then cover and boil until very soft, 3 to 5 hours. With a pressure cooker, the proper consistency can usually be reached within 2 hours.
When done, allow the beans to cool to 100°F (38°F). Drain off the cooking water and reserve in a large bowl. Measure koji rice into another container and hydrate with just enough of the cooled cooking water to moisten the grains. When soft, mix in the salt and seed miso, if using, then add the cooked beans and mash thoroughly.
Sanitize and salt your fermenter, then pack the bean paste into it, pressing out any air bubbles as you go. Smooth the surface, dust with a bit more salt, then cover with a fitted piece of clean cloth. Add a plate, dish, or lid to cover, then place a weight on top that’s approximately the same weight as the miso.
Allow to ferment at room temperature for 6 months, checking every month or so to remove tamari, if desired, and to check for mold growth. Use a cloth and a spray bottle of pure grain alcohol to clean the inside of the fermenter as necessary, sprinkling more salt around the edges to discourage mold growth. When fermentation is complete, pack into a Mason-type jar with a lid and keep in the refrigerator for use.
Amahl Turczyn continues to brew and write at his home in Lafayette, Colo.
The post You Can Ferment That: How to Make Miso appeared first on American Homebrewers Association.